Authenticating your users
In this article we’re going to look at OpenID tokens, how we use them for authenticating your end users and how that forms the Bring-Your-Own-User model - this will let the user’s of your app make direct calls to Sentry Interactive APIs and is the first step to actually unlocking a door.
Setup Your Application
Start by heading over to our application console and logging in (or creating a Sentry Interactive account if you don't already have one), then click "Add Application" to get started.
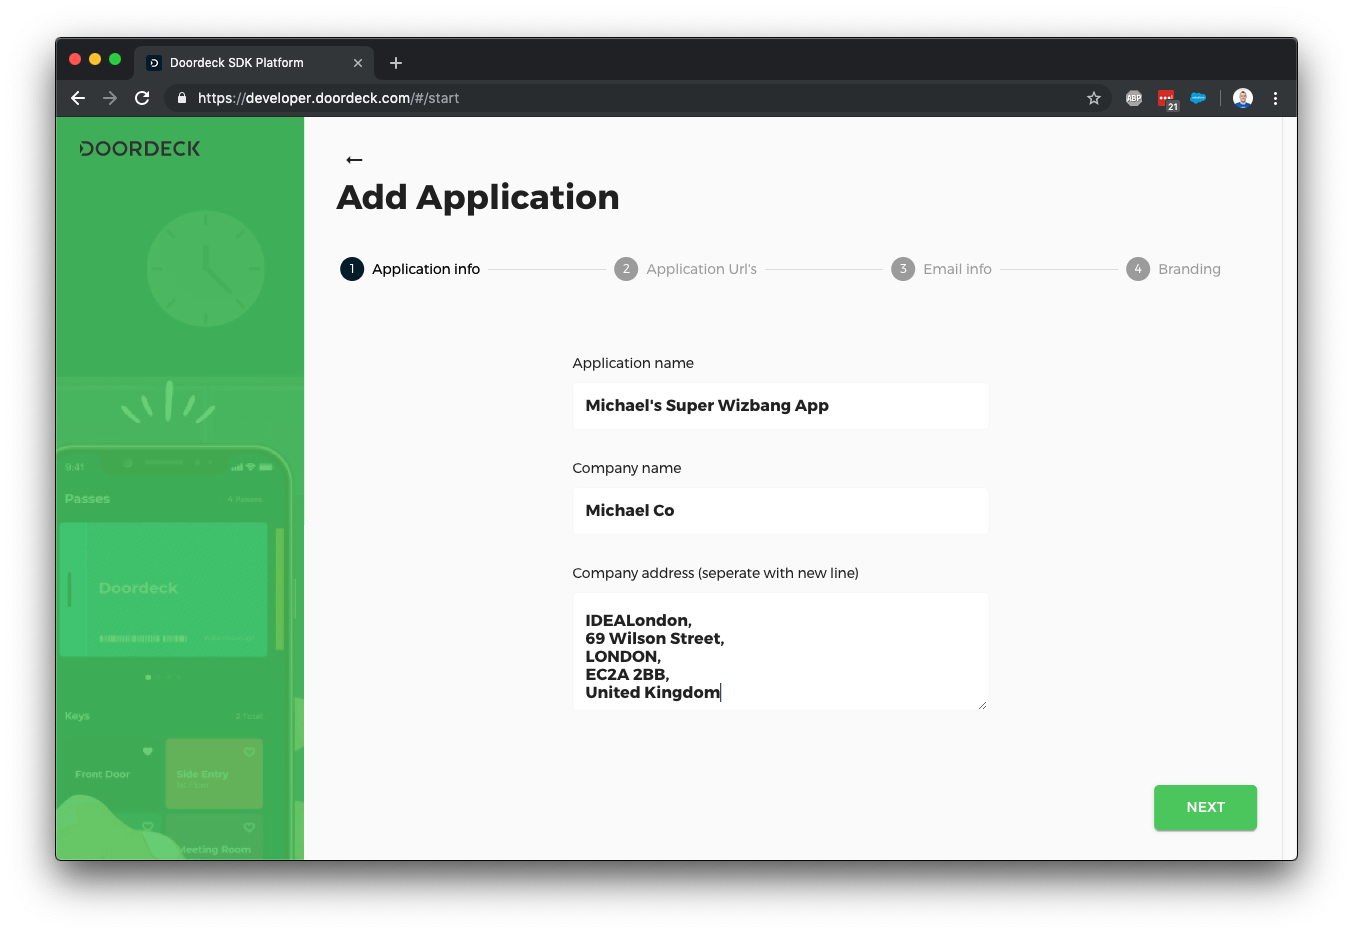
Our application wizard guides you through a few steps:
-
First, we need to know about your application and company – this information is used in a few places throughout the product.
-
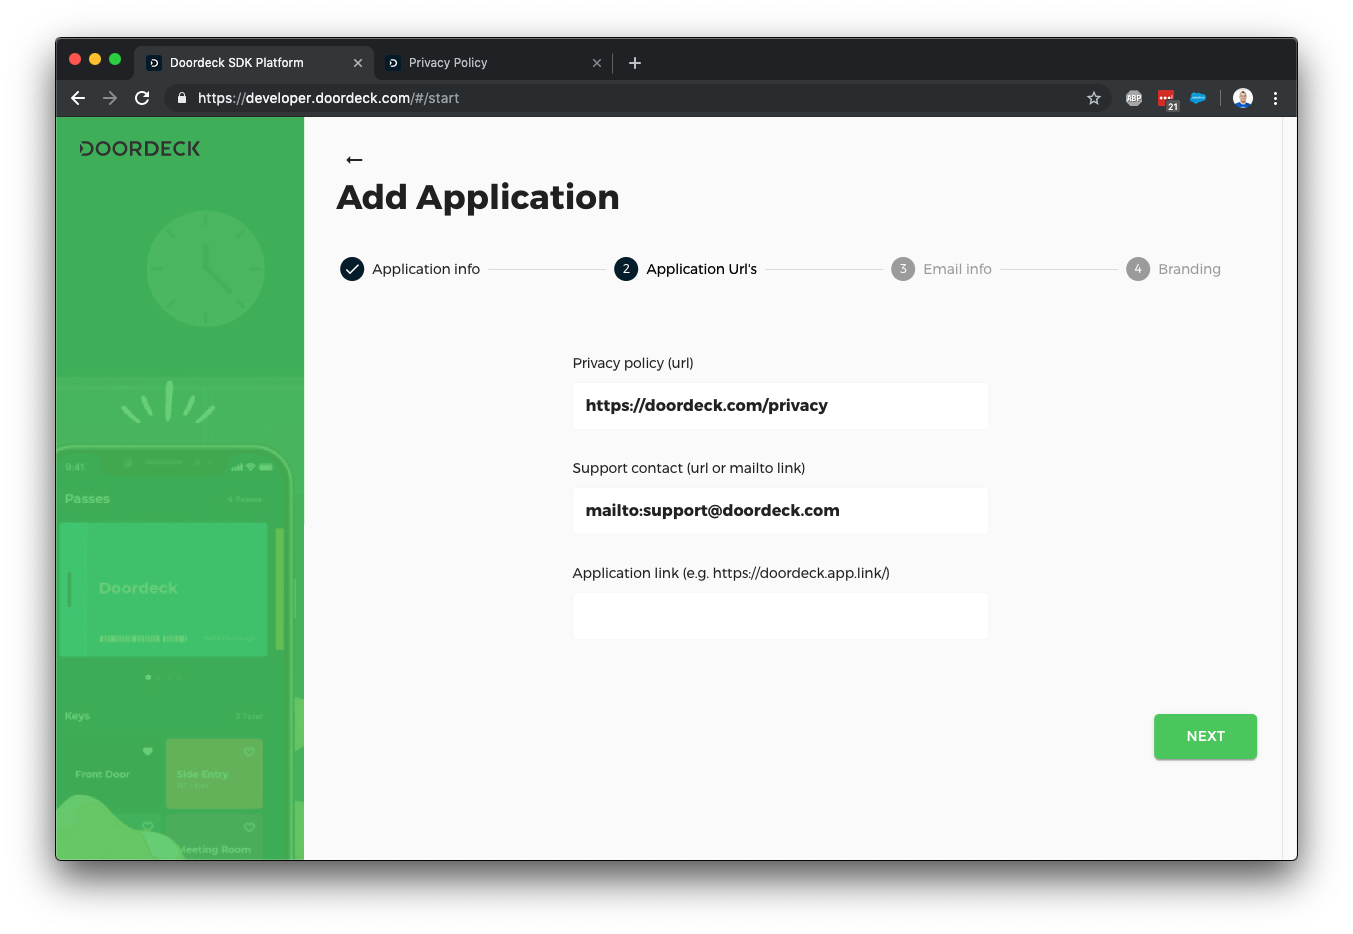
The next screen allows you to configure your privacy policy URL and any support contact details – the "application link" field is in case you have something like branch.io set up for your application so we can launch it directly. We can always come back to this later.
-
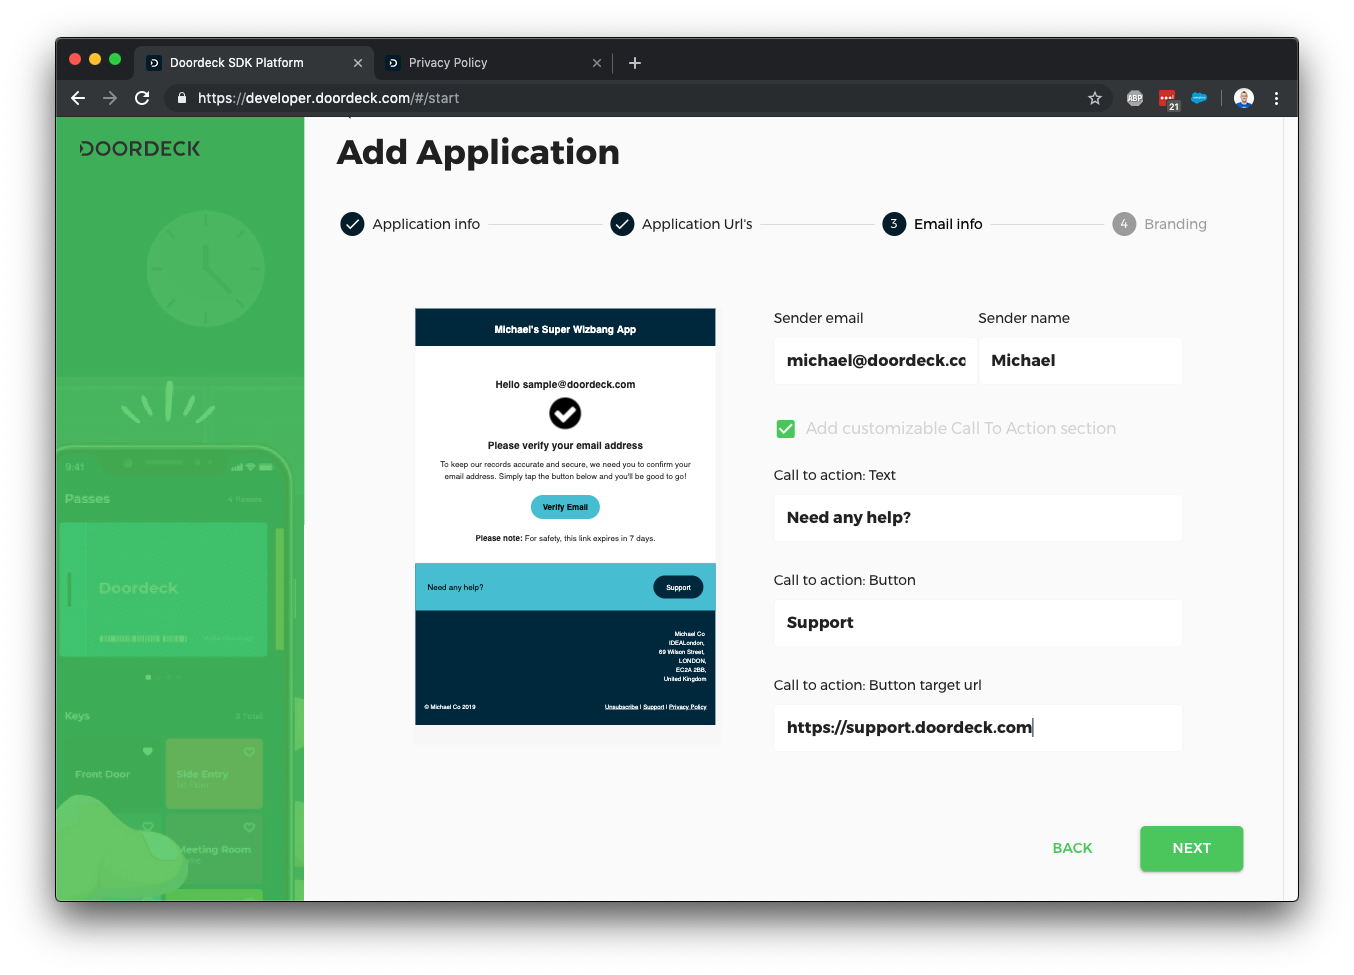
We occasionally need to send emails on behalf of your application to your users (such as secondary authentication checks). This screen lets you customize those emails – we may reach out via a support ticket if additional configuration is needed to send email from your address.
-
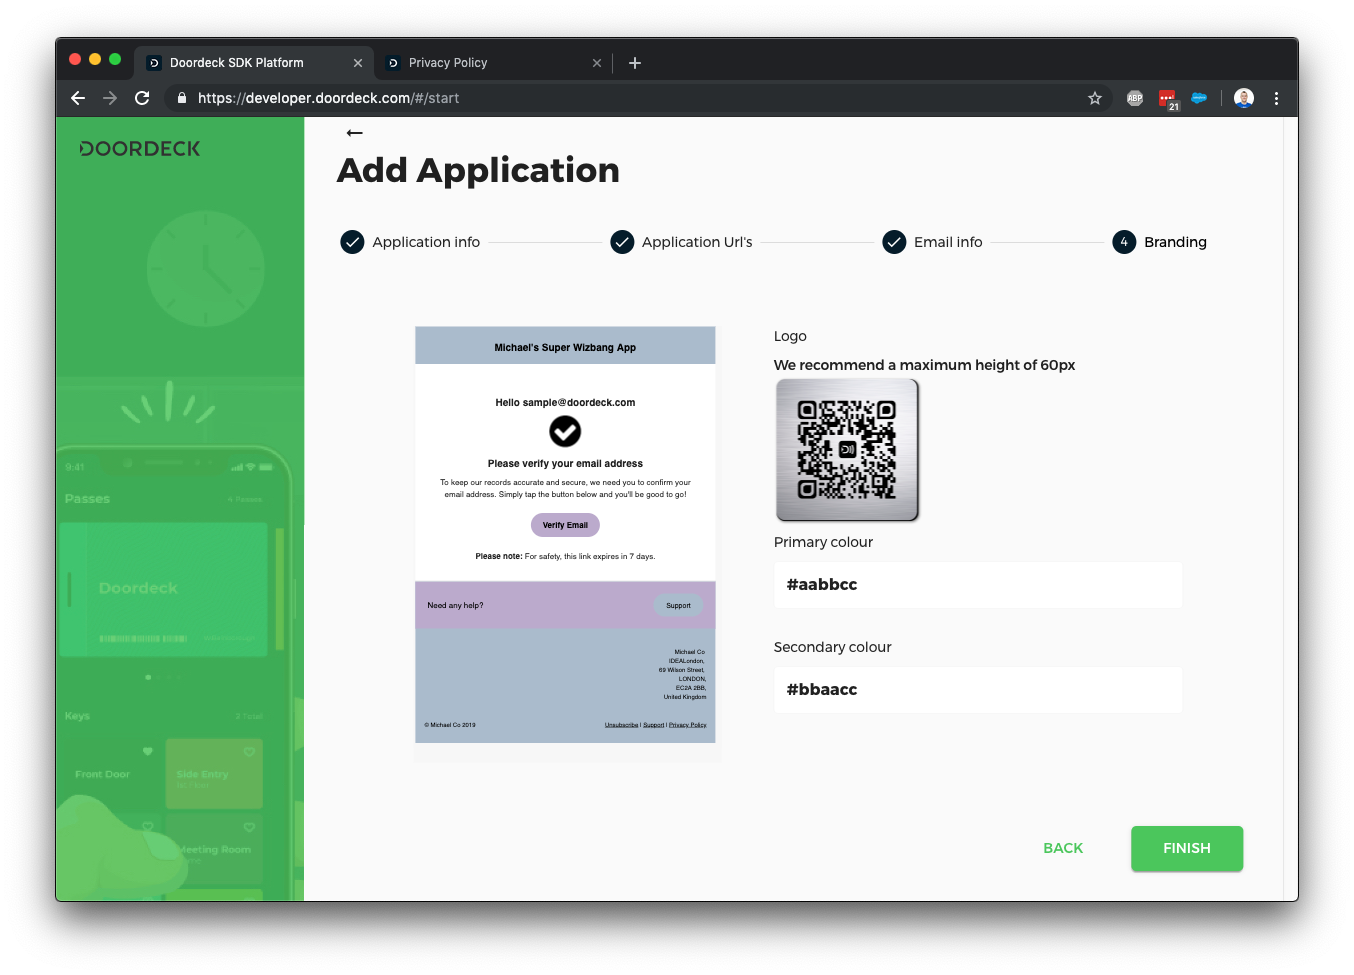
Finally, you can further customize the emails by adding some color and a logo.
Once the application is created, we should go in and edit a few further details to get authentication going.
Generating an Auth Signing Key
We're going to need an auth signing key. This must be an asymmetric key supported by JWT. To save explanation time, you can use mkjwk.org to generate either an RSA or Elliptic Curve key pair (but you probably shouldn't use that site for production). Select "Signing" as the key use and give it a unique key ID.
Once you have the key pair:
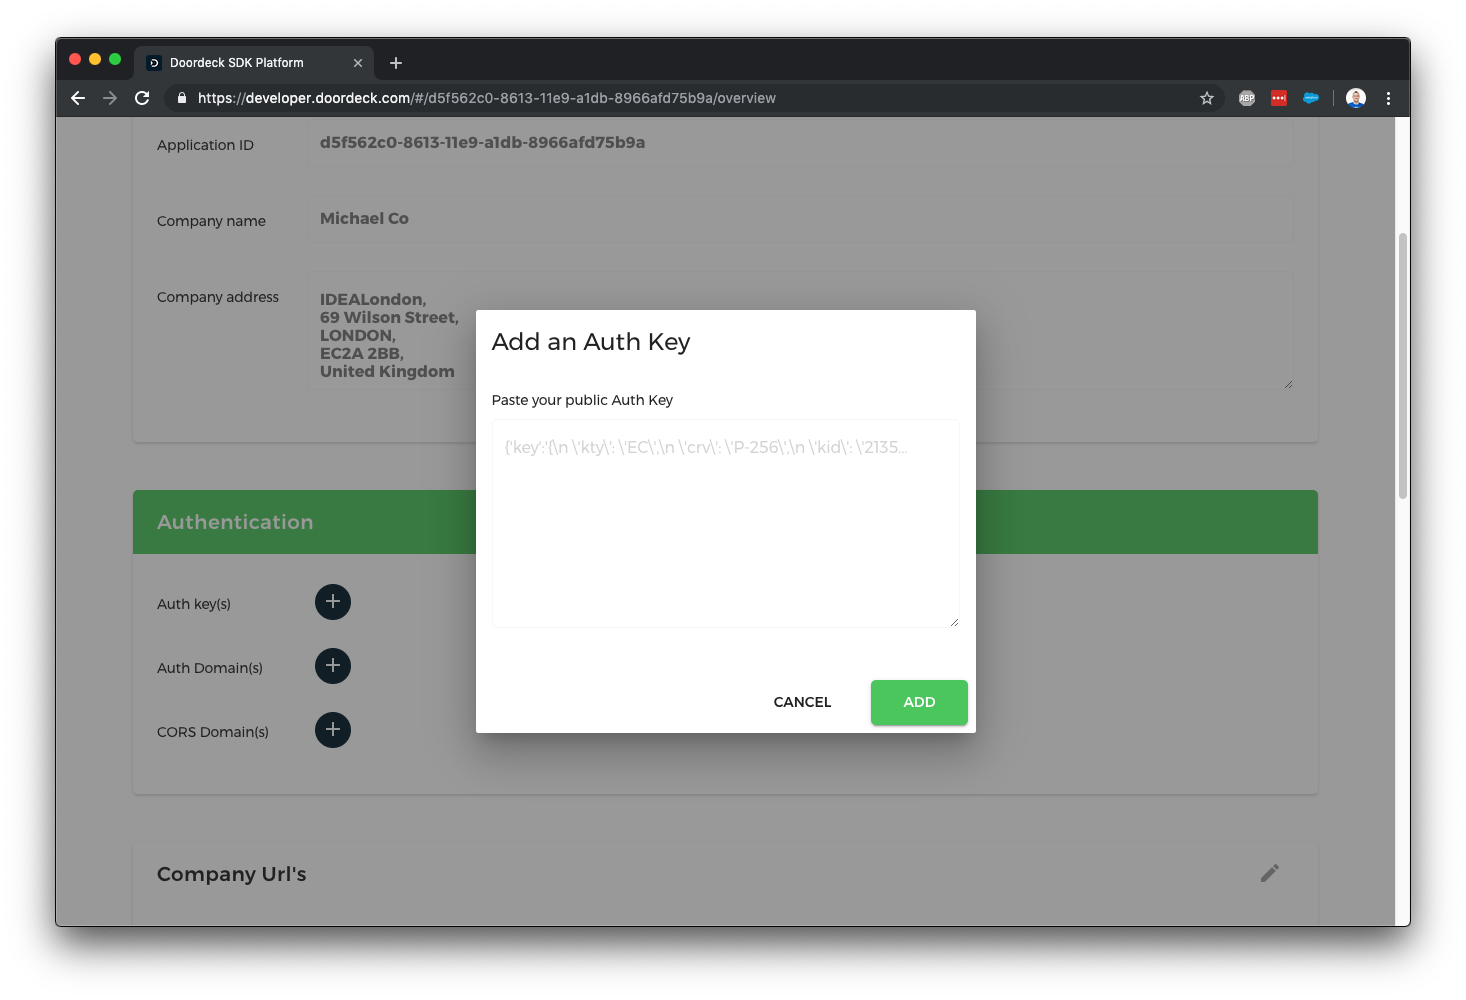
- Copy the public key JSON shown on mkjwk.org.
- In the Sentry Interactive Developer Console, navigate to your application and click the "+" next to Auth Keys, then
paste the public key JSON.
Configuring Your Auth Issuer
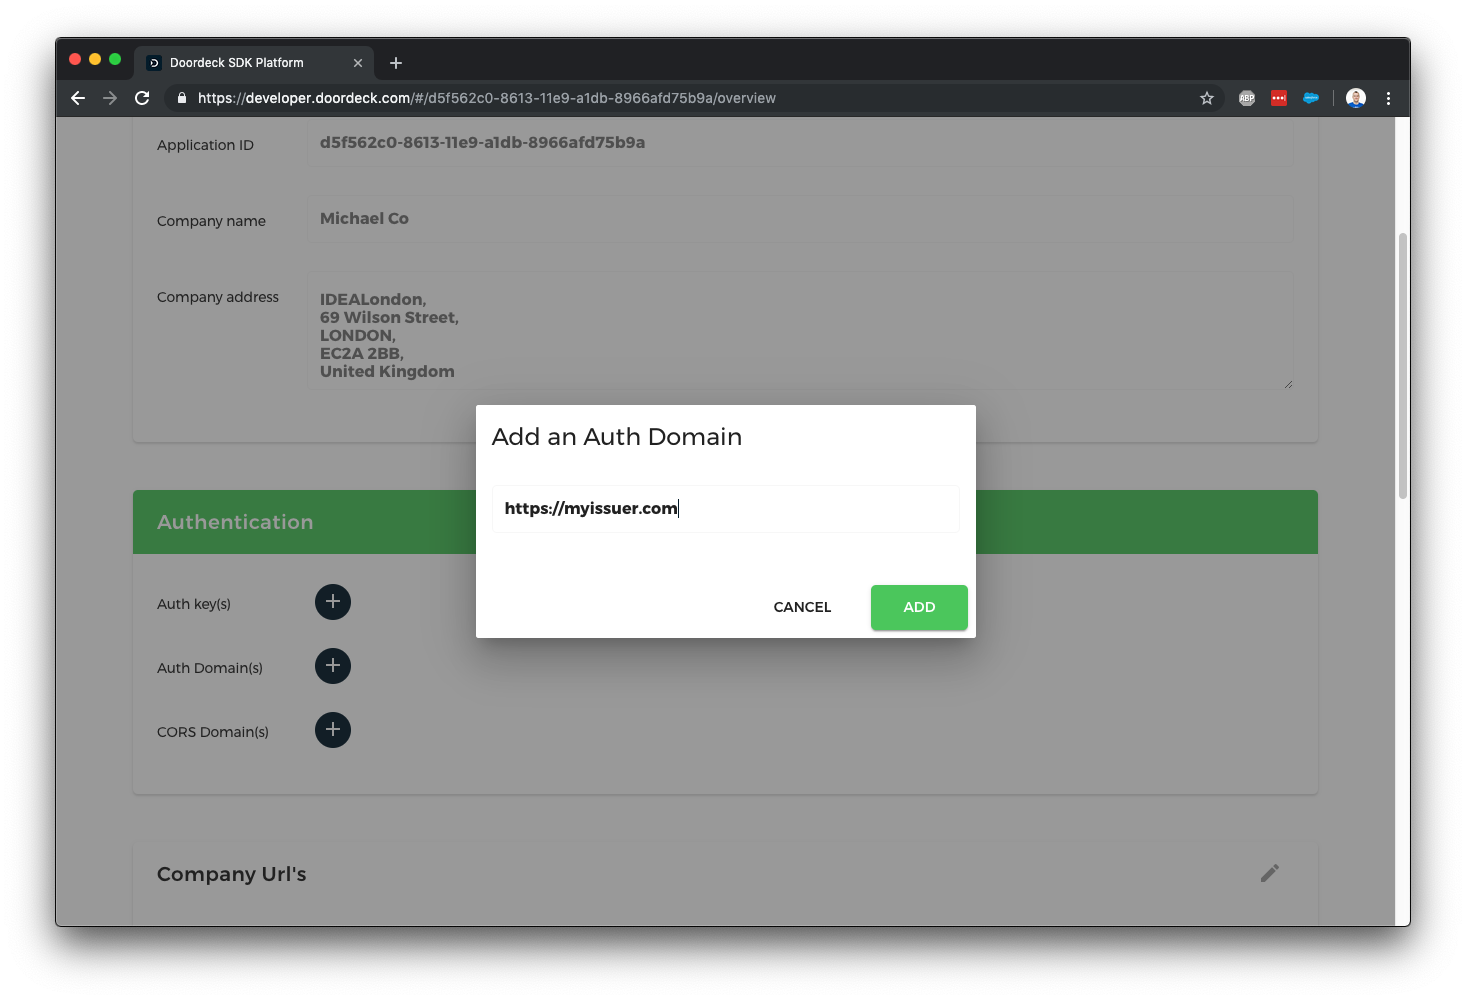
The last step in setting up authentication is to tell Sentry Interactive what your authentication issuer is. This is a URL
which you control and is unique to each application (for example, https://myapp.com/). It can have a path if you need
to differentiate multiple apps on a single domain. You'll need to reference this URL exactly when creating OpenID
tokens. Click the "+" next to Auth Domains and enter your issuer exactly.
The auth issuer URL is used to validate the iss (issuer) claim in the OpenID tokens you generate. It must exactly
match the URL you specify here, including the case & trailing slash if you include one.
At this point, you've:
- Created an application in the Sentry Interactive Developer Console.
- Generated an auth signing key and registered its public key with Sentry Interactive.
- Specified your auth issuer URL.
Next, we'll create some authentication tokens you can pass to your users so they can make direct calls against the Sentry Interactive APIs.
Generate OpenID Token
Now that we've set up an application and told Sentry Interactive which public key to use for validation, we can start generating OpenID tokens. OpenID tokens are just JWTs (JSON Web Tokens) with a specific set of fields. There are hundreds of libraries available to help generate JWTs, so you usually shouldn't do this manually, but we'll outline a minimal example here.
As a quick aside, we don't support all OpenID tokens, but we won't reject any tokens that include extra, this is the full list we support:
| Field | Mandatory/Optional | Description |
|---|---|---|
| Optional* | ||
| email_verified | Optional | Defaults to false |
| telephone | Optional* | |
| telephone_verified | Optional | Defaults to false |
| name | Optional | Display name |
| locale | Optional | Used for localization of certain values (e.g. en-gb) |
| picture | Optional | URI to person's picture |
| nonce | Optional | |
| iss | Mandatory | Must exactly match the issuer you told us about in the last step |
| exp | Mandatory | Unix timestamp of when this token should be considered invalid, use a sensible date, e.g. now + 1 day |
| iat | Mandatory | Unix timestamp token was generated |
| auth_time | Optional | Unix timestamp user last authenticated |
| sub | Mandatory | Unique user ID as known by your application |
| aud | Mandatory | Can be one or more intended audiences of this token, should include https://api.doordeck.com |
| sid | Optional | Session ID, useful for being able to destroy a session |
| zoneinfo | Optional | Timezone information, used for displaying dates in local format (e.g. Europe/London) |
| family_name | Optional | These will be simplified to 'name' if name is absent |
| middle_name | Optional | These will be simplified to 'name' if name is absent |
| given_name | Optional | These will be simplified to 'name' if name is absent |
* At least one of the email or telephone must be provided.
Based on the above, a minimal OpenID token may look as follows:
{
  "iss":"https://myapp.com/",
  "exp":1553904000,
  "iat":1552926912,
  "aud":"https://api.doordeck.com",
  "sub":"1",
  "email":"michael@doordeck.com",
  "email_verified":true,
  "name":"Michael Barnwell",
  "locale":"en-gb",
  "zoneinfo":"Europe/London"
}
JWT Header
OpenID/JWT also needs a header and a signature, the header is easy enough - we have to state what algorithm we've used to generate the signature and the key ID used:
{
  "alg": "RS256",
  "kid": "2019-03-15"
}
Constructing the Token
-
Strip whitespace from the header and payload, then Base64Url-encode each.
-
Concatenate the encoded header and payload with a period (
.) in between. -
The result will look like:
JSON Web Token (without signature)eyJhbGciOiJSUzI1NiIsImtpZCI6IjIwMTktMDMtMTUifQ.eyJpc3MiOiJodHRwczovL215YXBwLmNvbS8iLCJleHAiOjE1NTM5MDQwMDAsImlhdCI6MTU1MjkyNjkxMiwiYXVkIjoiaHR0cHM6Ly9hcGkuZG9vcmRlY2suY29tIiwic3ViIjoiMSIsImVtYWlsIjoibWljaGFlbEBkb29yZGVjay5jb20iLCJlbWFpbF92ZXJpZmllZCI6dHJ1ZSwibmFtZSI6Ik1pY2hhZWwgQmFybndlbGwiLCJsb2NhbGUiOiJlbi1nYiIsInpvbmVpbmZvIjoiRXVyb3BlL0xvbmRvbiJ9 -
Sign this concatenated string using your private key (the key you generated earlier).
-
Base64Url-encode the signature and append it to the string with another period.
The final token might look like this:
Complete JSON Web TokeneyJhbGciOiJSUzI1NiIsImtpZCI6IjIwMTktMDMtMTUifQ.eyJpc3MiOiJodHRwczovL215YXBwLmNvbS8iLCJleHAiOjE1NTM5MDQwMDAsImlhdCI6MTU1MjkyNjkxMiwiYXVkIjoiaHR0cHM6Ly9hcGkuZG9vcmRlY2suY29tIiwic3ViIjoiMSIsImVtYWlsIjoibWljaGFlbEBkb29yZGVjay5jb20iLCJlbWFpbF92ZXJpZmllZCI6dHJ1ZSwibmFtZSI6Ik1pY2hhZWwgQmFybndlbGwiLCJsb2NhbGUiOiJlbi1nYiIsInpvbmVpbmZvIjoiRXVyb3BlL0xvbmRvbiJ9.Y9oHuxTd58tUukdEaR8hHpCt9ZH9NW1NextAd98ELUf2wjHXMzFO6-1Lc3HAqRnYo_hkOFrs4bcxo57NF70DH7Qu0uiZgQZzivHEtaQ7AUetcQzyPRDNnosj-bpB7Ya00lbTmoXuW_vqa-eeRGmy78DehDI5YkGXq0ddl963hex3esozVwLWgbHNnMUC4YZCWMuzWbI39KCOxsEDsNGrCCgh8yemq_gMWCSbJCtlEBqxKJzRD63--4cuXZdF_Y2_BQmVkecvozEe3hM9ooqSPyP8W_miTkL559TvdqrO_TpPkp5BElJJqifnio5drjCFBAWQZOeaT3IdgPFz6DlYlw
Once the token is signed, it is ready to be used to make authenticated calls against the Sentry Interactive API.
If you're unfamiliar with JWTs, the JWT.io Introduction is an excellent resource.
Security Notes
The process described above is only one of several security measures we use. You cannot unlock a door solely using an auth token, as additional cryptographic steps are required when performing unlock operations (see the guide on ephemeral key registration & unlocking a door).
However, the auth signing key is a critical security measure and must be treated as such:
- Store it in a Key Management Service (KMS) (e.g., AWS KMS or Google Cloud KMS) or Hardware Security Module (HSM).
- Notify Sentry Interactive immediately if the key becomes compromised. We support expiry dates on signing keys so you can revoke a compromised key or schedule it for deletion and rotate to a new key.
Many of the token fields are optional but encouraged. The more information we have, the better decisions we can make about when to request secondary authentication (e.g., when a user logs in from a new device).
User Management Notes
Whenever you send Sentry Interactive a new signed user token, we update our internal user record to match the latest details.
Users are keyed on Application ID + your unique internal identifier (sub claim). As long as those two values
remain the same, any other fields (such as email, phone_number, etc.) will update automatically based on the iat
(issued-at) timestamp.
Important:
- Email and telephone details must be unique across your user base.
- If they aren't unique, do not use the email or telephone lookup methods described in the Get a third-party user's public key endpoint.
Testing the Auth Token
Typically, the first API call you make is to register the user's ephemeral key, but we cover that in the next article. For now, you can test your token with our "Echo Auth" endpoint, which simply returns back the decoded auth data. Example:
curl \
  https://api.doordeck.com/platform/auth \
  -H "Authorization: Bearer ${USER_TOKEN}"
Clean Up
If you decide you no longer want your application (or want to start fresh), please delete it. There is a "Remove" button at the bottom of your application details in the Developer Console.
Summary
We've covered how to:
- Create an application in the Sentry Interactive Developer Console.
- Generate and register an asymmetric signing key for OpenID.
- Configure your auth issuer URL.
- Generate OpenID tokens (JWTs) that your users can use to call Sentry Interactive's APIs directly.
The goal is that you maintain your own user authentication (e.g., username/password, OAuth, SAML, etc.), then exchange your internal tokens or session cookies for a Sentry Interactive-compatible JWT. This allows end users to make low-latency calls directly against our APIs to unlock doors or perform other operations securely.